Recently I got the question if we could automatically copy files from SharePoint to local disk for back-up purpose. After evaluating several options I chose Microsoft Flow, or ‘Power Automate’ as it’s called these days to build a solution. In this article I’m going to explain the steps to copy files from a SharePoint folder to a local disk.
Setting up a gateway
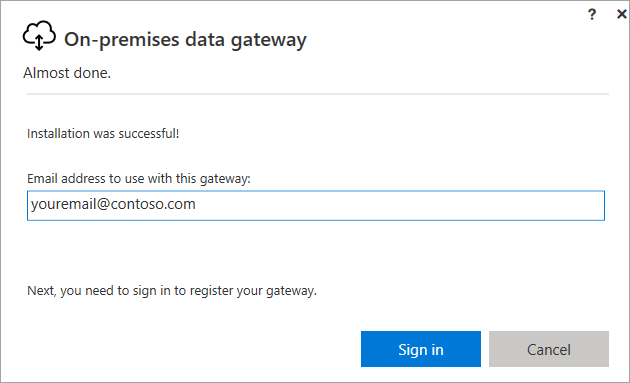
The first thing we need to do is install a piece of software on the pc we want to receive the SharePoint files on. Microsoft created a tool called ‘On-premises data gateway’. You can download it here. Start the installation file, leave the default install path in place and accept the terms of use. You now get the question to enter a email address. Use the address of your Office 365/Azure account so that this gateway is associated with your account.
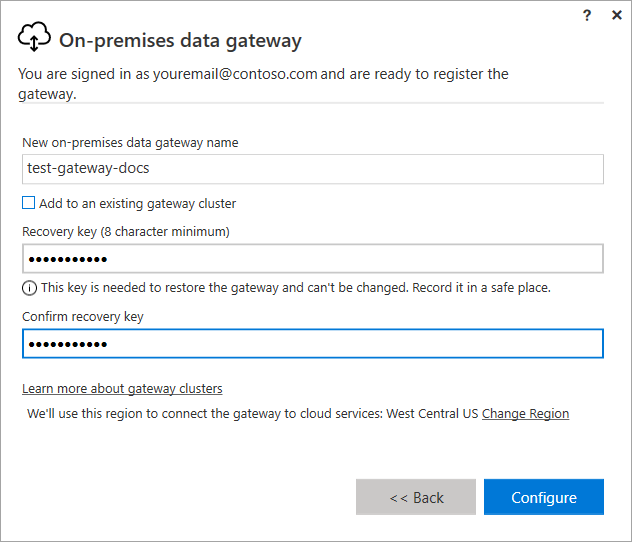
After you signed in, register a new gateway by choosing ‘Register a new gateway on this computer’. In the next step, you can choose how to name your gateway. Pick something so you can identify within Office 365 what computer the gateway talks to. Also create a recovery key and store it in a safe place.
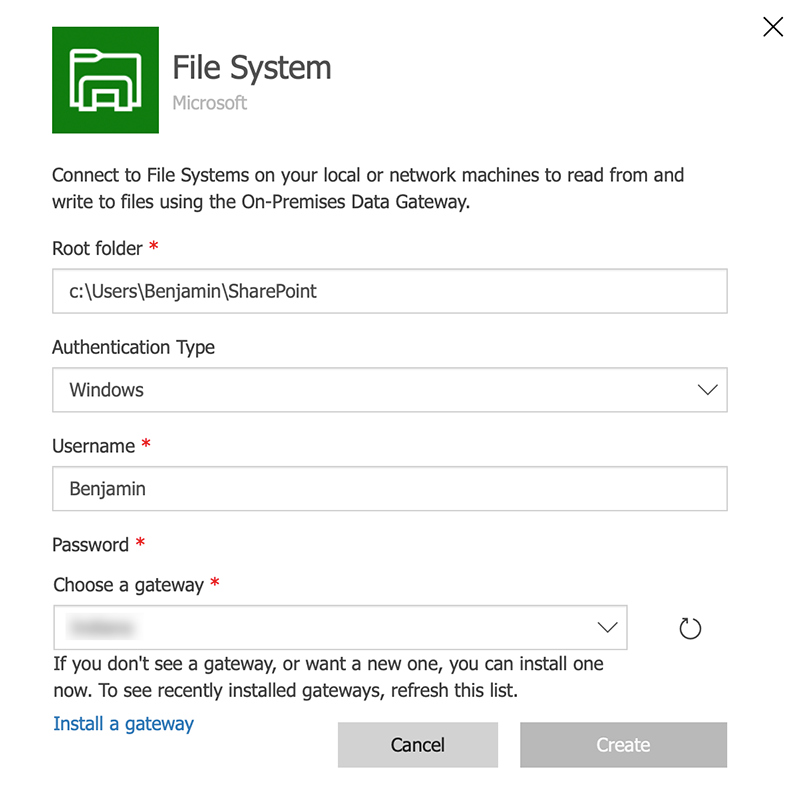
Now create a folder on your local disk where you want to copy the SharePoint files to. From my experience it works best if you choose a folder within your users folder, so for example: ‘c:\users\benjamin\SharePoint’. In contrary to some sources on the web, you don’t have to share this folder. Just provide the local credentials to access this folder later in the setup process. After this step you’re done configuring the gateway on your PC. Let’s move on to the Office 365 part!
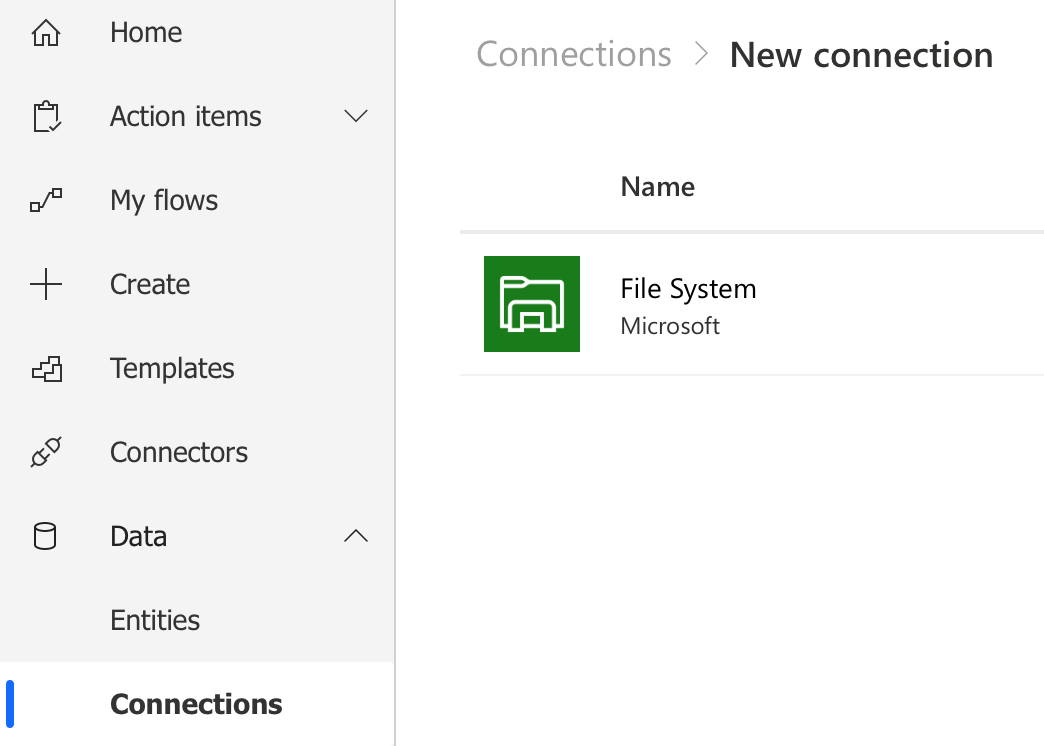
In Office 365 go to ‘Power automate’ -> ‘Connections’ -> ‘New connection’ and choose ‘File System’.
Now choose the path to were SharePoint may write files to. From my experience it works best to choose a path within the ‘Users’ directory. So in this example I will choose my own account’s directory. Notice that the local gateway is associated with your computer because you logged in with your Office 365 account.
Configure your Flow
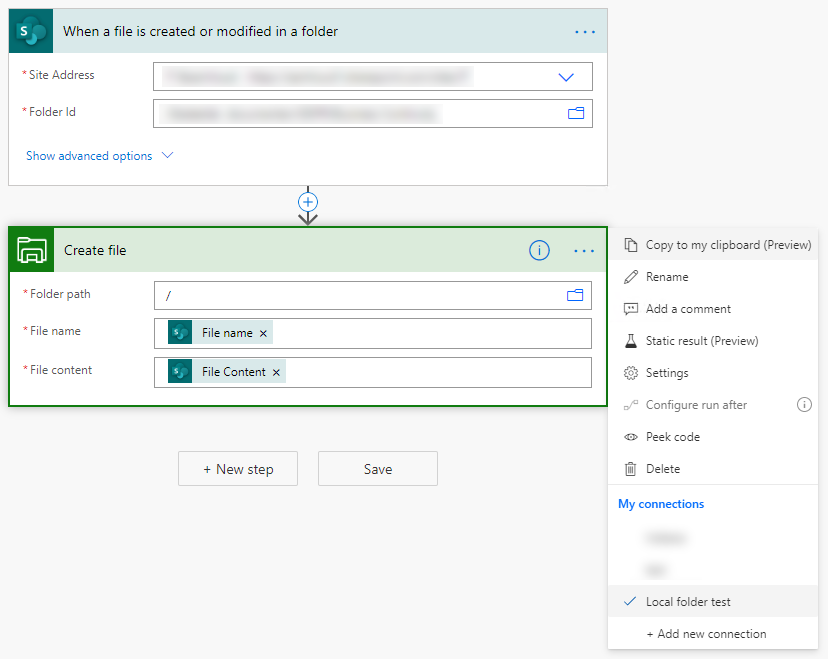
For this example I want to copy all the new files created in the specific folder and also update the files that where modified. For this I choose the trigger ‘When a file is created or modified in a folder’. Browse to the correct site address and choose the specific folder that you want to sync.
Now add an action called ‘Create file’. Connect the gateway that you’ve created earlier and choose at the folder path ‘/’. For the ‘File name’ and ‘File content’ choose the dynamic content options that have equal names. Your flow should now look something like this:
Test Flow
Before we consider the job done, let’s test our Flow. Go to ‘test’ in the top right corner and choose ‘I’ll perform the trigger action’. Now click ‘Test’ and move a file to the folder or modify a file within the folder. The change should now also copy to your local folder. If not, you will get an error with details of what is going wrong. Usually it has something to do with not correctly setting up the gateway, resulting in weird local folder paths which Flow can’t write files to.
Concluding
Copying files from SharePoint folders to a local disk can be done easily with Flow. You could always use The OneDrive application with SharePoint sync, but there are scenario’s where this is not the way to go. The major advantage is that files can not be deleted with this Flow solution. From my experience, the copy action happens every 10 minutes.
Microsoft Flow a very powerful tool with endless possibilities. This capabilities get further extended with the use of a local gateway. Enjoy tinkering!